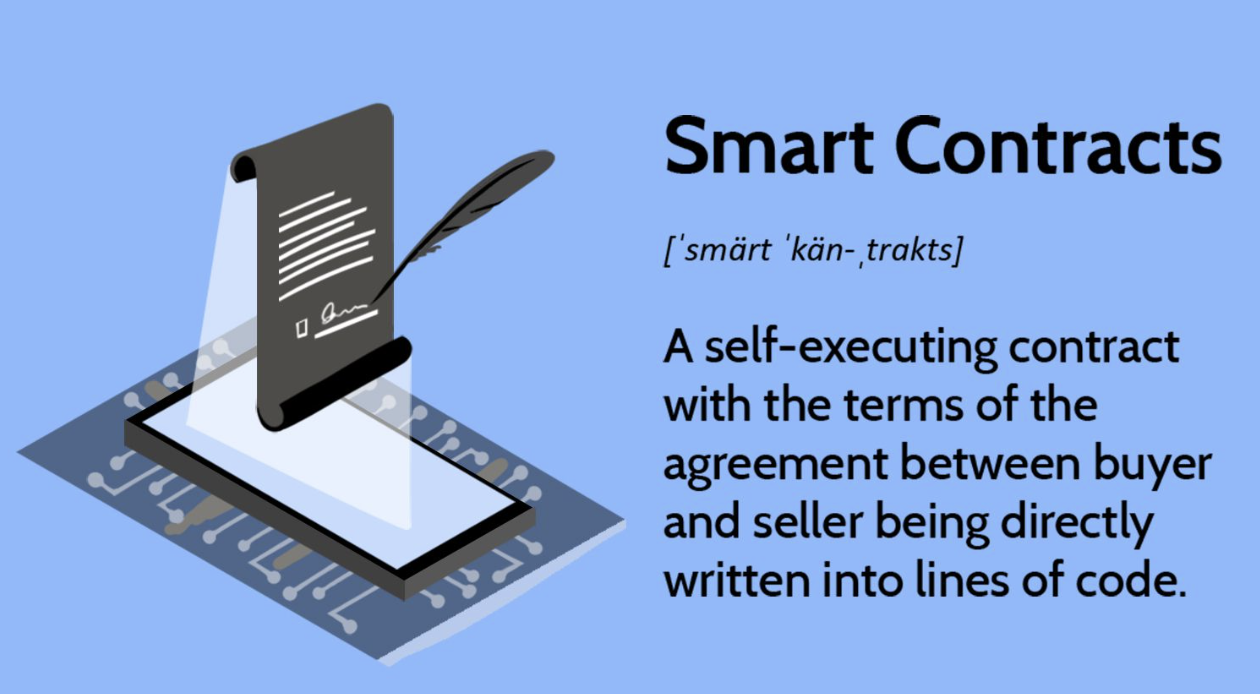
Deploy, invoke the Chaincode (Smart Contract), and Interact with the Network
This is the second post of The Complete Guide to Hyperledger Fabric in 2023. The first post includes 5 steps to set up the blockchain network.
Step 1: Open Docker Desktop, to let the Docker Daemon runs
Step 2: Clone the Hyperledger Fabric Sample repository, pull down the Docker images, and download the platform-specific binary
Step 3: Add the bin sub-directory into the PATH environment variable
Step 4: Bring up the network
Step 5: Create a channel
It is all about: Set up the Blockchain Network. Therefore, don't move on to Step 6 until you finished the setup with first post.
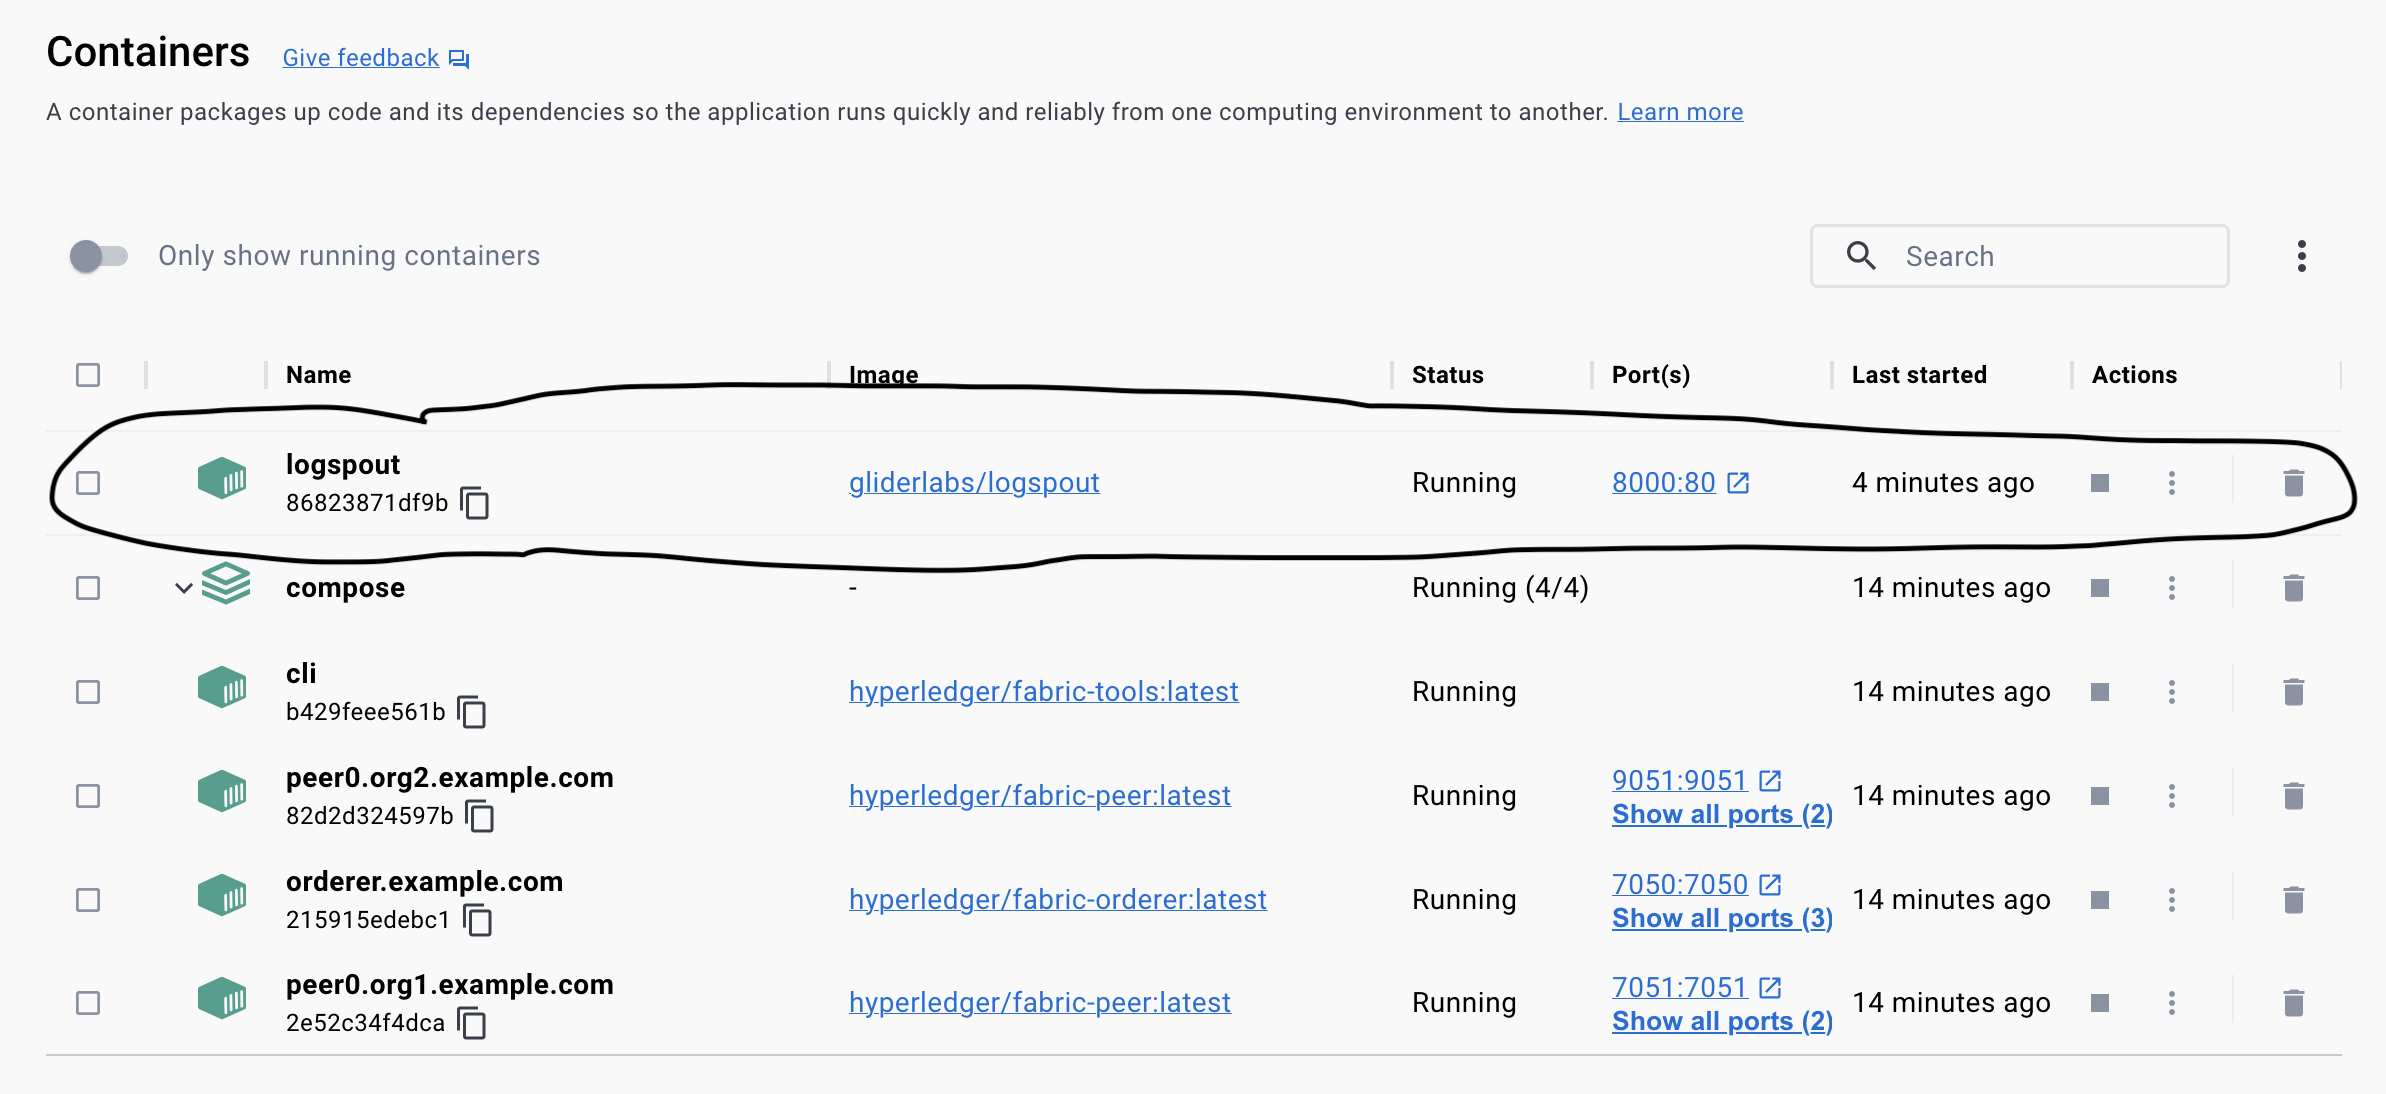
Step 6: Stream logs to the terminal with Logspout
To monitor the logs of the smart contract during development, you can view the aggregated output from a set of Docker containers using the Logspout tool. It collects the output streams from different Docker containers into one place, making it easy to see what’s happening from a single terminal pane.
You're still operating from the test-network directory. A script is included in it: monitordocker.sh. You can start the Logspout by running the command:
./monitordocker.sh fabric_test
Since you're running the command first time, it will pull the Docker image first and then run it as a container. It will reflect in both Terminal and Docker Desktop:
Terminal
Starting monitoring on all containers on the network fabric_test
Unable to find image 'gliderlabs/logspout:latest' locally
latest: Pulling from gliderlabs/logspout
8572bc8fb8a3: Pull complete
bd801371a862: Pull complete
58100c398b34: Pull complete
Digest: sha256:2d81c026e11ac67f7887029dbfd7d36ee986d946066b45c1dabd966278eb5681
Status: Downloaded newer image for gliderlabs/logspout:latest
86823871df9b5cabc4e9b7a72ed146ade9ea28fcfbb72821692c7076e14756a9
Docker Desktop

Step 7: Package the smart contract into chaincode
In Hyperledger Fabric, smart contracts are deployed on the network in packages referred to as chaincode. Think of it like compiling. The smart contract is the source code and chaincode is the machine code. You translate smart contract into chaincode like how the source code is compilied into an executable program.
In the fabric-samples repo, there is a directory asset-transfer-basic that contains Go, Typescript, and Javascript versions of the smart contract. In this tutorial guide, you're going to go with the Go version. Hence:
cd fabric-samples/asset-transfer-basic/chaincode-go
Then install the smart contract dependencies with the following command:
GO111MODULE=on go mod vendor
The Go packages will be installed inside a vendor folder under the chaincode-go directory.
Sidenote: you will start to see the Logspout streaming the logs
Now that you have the necessary dependencies, you can create chaincode package. Navigate back to the working directory in test-network folder so that you can package the chaincode together with other network artifacts:
cd ../../test-network
The core.yaml file in the fabric-samples repo is the configuration file that configures the peer binary that you're going to use next. So you have to set the FABRIC_CFG_PATH to point to the core.yaml file as such:
export FABRIC_CFG_PATH={Your fabric-samples repo}/../config/The stage is set. Let's create your very first chaincode package. Run:
peer lifecycle chaincode package basic.tar.gz --path ../asset-transfer-basic/chaincode-go/ --lang golang --label basic_1.0
A package named basic.tar.gz will then be created in the current directory.
Step 8: Install the chaincode onto the peer(s)
The chaincode needs to be installed on every peer that will endorse a transaction. As you are going to set the endorsement policy to require endorsements from both Org1 and Org2, you need to install the chaincode on the peers operated by both organizations:
- peer0.org1.example.com
- peer0.org2.example.com
You will install the chaincode on the Org1 peer first. Let's set the corresponding environment variables to operate the peer as the Org1:
export CORE_PEER_TLS_ENABLED=true
export CORE_PEER_LOCALMSPID="Org1MSP"
export CORE_PEER_TLS_ROOTCERT_FILE={Your fabric-samples repo}/test-network/organizations/peerOrganizations/org1.example.com/peers/peer0.org1.example.com/tls/ca.crt
export CORE_PEER_MSPCONFIGPATH={Your fabric-samples repo}/test-network/organizations/peerOrganizations/org1.example.com/users/Admin@org1.example.com/msp
export CORE_PEER_ADDRESS=localhost:7051
And run the install command:
peer lifecycle chaincode install basic.tar.gz
A status 200 response back will be shown:
Terminal
2023-03-16 17:29:01.934 HKT 0001 INFO [cli.lifecycle.chaincode] submitInstallProposal -> Installed remotely: response:<status:200 payload:"\nJbasic_1.0:d29562b85321d821cc02fddff4366e54b9bdbfa5d51647b5613141dd4d947b9e\022\tbasic_1.0" >
2023-03-16 17:29:01.942 HKT 0002 INFO [cli.lifecycle.chaincode] submitInstallProposal -> Chaincode code package identifier: basic_1.0:d29562b85321d821cc02fddff4366e54b9bdbfa5d51647b5613141dd4d947b9e
You can now install the chaincode on the Org2 peer. Let's export the environment variables to operate as the Org2:
export CORE_PEER_LOCALMSPID="Org2MSP"
export CORE_PEER_TLS_ROOTCERT_FILE={Your fabric-samples repo}/test-network/organizations/peerOrganizations/org2.example.com/peers/peer0.org2.example.com/tls/ca.crt
export CORE_PEER_MSPCONFIGPATH={Your fabric-samples repo}/test-network/organizations/peerOrganizations/org2.example.com/users/Admin@org2.example.com/msp
export CORE_PEER_ADDRESS=localhost:9051
And run the install command:
peer lifecycle chaincode install basic.tar.gz
Once again, a status 200 response back will be shown:
Terminal
2023-03-16 17:36:40.990 HKT 0001 INFO [cli.lifecycle.chaincode] submitInstallProposal -> Installed remotely: response:<status:200 payload:"\nJbasic_1.0:d29562b85321d821cc02fddff4366e54b9bdbfa5d51647b5613141dd4d947b9e\022\tbasic_1.0" >
2023-03-16 17:36:40.992 HKT 0002 INFO [cli.lifecycle.chaincode] submitInstallProposal -> Chaincode code package identifier: basic_1.0:d29562b85321d821cc02fddff4366e54b9bdbfa5d51647b5613141dd4d947b9e
Step 9: Approve the chaincode definition as peer
The set of channel members who need to approve a chaincode before it can be deployed is governed by the lifecycle-endorsement-policy.json policy. By default, this policy requires that a majority of channel members need to approve a chaincode before it can be used on a channel. You have only two organizations on the channel, and a majority of 2 is 2, so you need to approve a chaincode definition of asset-transfer-basic as Org1 and Org2.
Besides, if an organization has installed the chaincode on its peer, the organization needs to include the packageID in the chaincode definition to get approval. The package ID is used to associate the chaincode installed on a peer with an approved chaincode definition, and allows an organization to use the chaincode to endorse transactions.
You can find the package ID of a chaincode with the command:
peer lifecycle chaincode queryinstalled
Then you will find the package ID from the query output:
Terminal
Installed chaincodes on peer:
Package ID: basic_1.0:d29562b85321d821cc02fddff4366e54b9bdbfa5d51647b5613141dd4d947b9e, Label: basic_1.0
You're going to use the package ID when you approve the chaincode. You have to save it as an environment variable. That's why the query. Go copy the package ID from the query output and paste into the environment variable:
export CC_PACKAGE_ID=basic_1.0:d29562b85321d821cc02fddff4366e54b9bdbfa5d51647b5613141dd4d947b9e
From the previous step, you firstly installed the chaincode as Org1 then as Org2. The environment variables have been set to operate the peer as Org2. So you can now approve the chaincode definition of asset-transfer-basic as Org2:
peer lifecycle chaincode approveformyorg -o localhost:7050 --ordererTLSHostnameOverride orderer.example.com --channelID mychannel --name basic --version 1.0 --package-id basic_1.0:d29562b85321d821cc02fddff4366e54b9bdbfa5d51647b5613141dd4d947b9e --sequence 1 --tls --cafile "{Your fabric-samples repo}/test-network/organizations/ordererOrganizations/example.com/orderers/orderer.example.com/msp/tlscacerts/tlsca.example.com-cert.pem"Chaincode is approved at the organization level, so the command only needs to target one peer. The approval is distributed to other peers within the organization using gossip data dissemination protocol.
You'll see a status (VALID) message:
Terminal
2023-03-17 07:25:27.074 HKT 0001 INFO [chaincodeCmd] ClientWait -> txid [e9991bde09297e18f1c22dfb36e2a417d1d01d61c3760b261bbd66db8f99127a] committed with status (VALID) at localhost:9051
You still need to approve the chaincode definition as Org1. Modify the environment variables to operate as Org1:
export CORE_PEER_LOCALMSPID="Org1MSP"
export CORE_PEER_MSPCONFIGPATH={Your fabric-samples repo}/test-network/organizations/peerOrganizations/org1.example.com/users/Admin@org1.example.com/msp
export CORE_PEER_TLS_ROOTCERT_FILE={Your fabric-samples repo}/test-network/organizations/peerOrganizations/org1.example.com/peers/peer0.org1.example.com/tls/ca.crt
export CORE_PEER_ADDRESS=localhost:7051
And approve the chaincode definition as Org1:
peer lifecycle chaincode approveformyorg -o localhost:7050 --ordererTLSHostnameOverride orderer.example.com --channelID mychannel --name basic --version 1.0 --package-id basic_1.0:d29562b85321d821cc02fddff4366e54b9bdbfa5d51647b5613141dd4d947b9e --sequence 1 --tls --cafile "{Your fabric-samples repo}/test-network/organizations/ordererOrganizations/example.com/orderers/orderer.example.com/msp/tlscacerts/tlsca.example.com-cert.pem"And get the status (VALID) message:
Terminal
2023-03-17 10:52:18.701 HKT 0001 INFO [chaincodeCmd] ClientWait -> txid [de9e525ad1f9da352d6a71818c7e632281614ac29b914dbdb3d9520e175542c7] committed with status (VALID) at localhost:7051
You're getting ready to commit the chaincode in next step. Let's run another query to check the commit readiness of chaincode. The command is semantic and straight forward:
peer lifecycle chaincode checkcommitreadiness --channelID mychannel --name basic --version 1.0 --sequence 1 --tls --cafile "{Your fabric-samples repo}/test-network/organizations/ordererOrganizations/example.com/orderers/orderer.example.com/msp/tlscacerts/tlsca.example.com-cert.pem" --output jsonYou will see an json object returned with Org1MSP and Org2MSP attributes, both of which the value are true:
{
    "Approvals": {
      "Org1MSP": true,
      "Org2MSP": true
    }
}
Step 10: Commit the chaincode defintion to channel
Both organizations that are members of the channel have approved the chaincode. You can run the commit command now:
peer lifecycle chaincode commit -o localhost:7050 --ordererTLSHostnameOverride orderer.example.com --channelID mychannel --name basic --version 1.0 --sequence 1 --tls --cafile "{Your fabric-samples repo}/test-network/organizations/ordererOrganizations/example.com/orderers/orderer.example.com/msp/tlscacerts/tlsca.example.com-cert.pem" --peerAddresses localhost:7051 --tlsRootCertFiles "{Your fabric-samples repo}/test-network/organizations/peerOrganizations/org1.example.com/peers/peer0.org1.example.com/tls/ca.crt" --peerAddresses localhost:9051 --tlsRootCertFiles "{Your fabric-samples repo}/test-network/organizations/peerOrganizations/org2.example.com/peers/peer0.org2.example.com/tls/ca.crt"Committed with status (VALID):
Terminal
2023-03-17 11:08:01.548 HKT 0001 INFO [chaincodeCmd] ClientWait -> txid [17df3fb4e9192359c6fea43c7ebbdb668283ed20430f4fb7fbd8b8bb4edaa255] committed with status (VALID) at localhost:7051
2023-03-17 11:08:01.684 HKT 0002 INFO [chaincodeCmd] ClientWait -> txid [17df3fb4e9192359c6fea43c7ebbdb668283ed20430f4fb7fbd8b8bb4edaa255] committed with status (VALID) at localhost:9051
Let's run another query to to confirm the chaincode definition has been committed to the channel:
peer lifecycle chaincode querycommitted --channelID mychannel --name basic
Committed chaincode definition for chaincode 'basic' on channel 'mychannel'. More details:
Terminal
Committed chaincode definition for chaincode 'basic' on channel 'mychannel':
Version: 1.0, Sequence: 1, Endorsement Plugin: escc, Validation Plugin: vscc, Approvals: [Org1MSP: true, Org2MSP: true]
Step 11: Invoke the chaincode
After the chaincode definition has been committed to a channel, the chaincode will start on the peers joined to the channel where the chaincode was installed. The asset-transfer-basic chaincode is now ready to be invoked by client applications. Try out:
peer chaincode invoke -o localhost:7050 --ordererTLSHostnameOverride orderer.example.com --tls --cafile "{Your fabric-samples repo}/test-network/organizations/ordererOrganizations/example.com/orderers/orderer.example.com/msp/tlscacerts/tlsca.example.com-cert.pem" -C mychannel -n basic --peerAddresses localhost:7051 --tlsRootCertFiles "{Your fabric-samples repo}/test-network/organizations/peerOrganizations/org1.example.com/peers/peer0.org1.example.com/tls/ca.crt" --peerAddresses localhost:9051 --tlsRootCertFiles "{Your fabric-samples repo}/test-network/organizations/peerOrganizations/org2.example.com/peers/peer0.org2.example.com/tls/ca.crt" -c '{"function":"InitLedger","Args":[]}'You just created an initial set of assets on the ledger:
Terminal
2023-03-17 11:28:06.377 HKT 0001 INFO [chaincodeCmd] chaincodeInvokeOrQuery -> Chaincode invoke successful. result: status:200
Let's take a deeper dive to see what exactly these assets are.
[
	{"AppraisedValue":"300","Color":"blue","ID":asset1,"owner":"Tomoko","Size":5},
	{"AppraisedValue":"400","Color":"red","ID":asset2,"owner":"Brad","Size":5},
	{"AppraisedValue":"500","Color":"green","ID":asset3,"owner":"Jin Soo","Size":10},
	{"AppraisedValue":"600","Color":"yellow","ID":asset4,"owner":"Max","Size":10},
	{"AppraisedValue":"700","Color":"black","ID":asset5,"owner":"Adriana","Size":15},
	{"AppraisedValue":"800","Color":"white","ID":asset6,"owner":"Michel","Size":15}
]
Step 12: Set up the Certificate Authority Server (Public Key Infrastructure)